
Tech Tip: Spark Plug Thread Repair
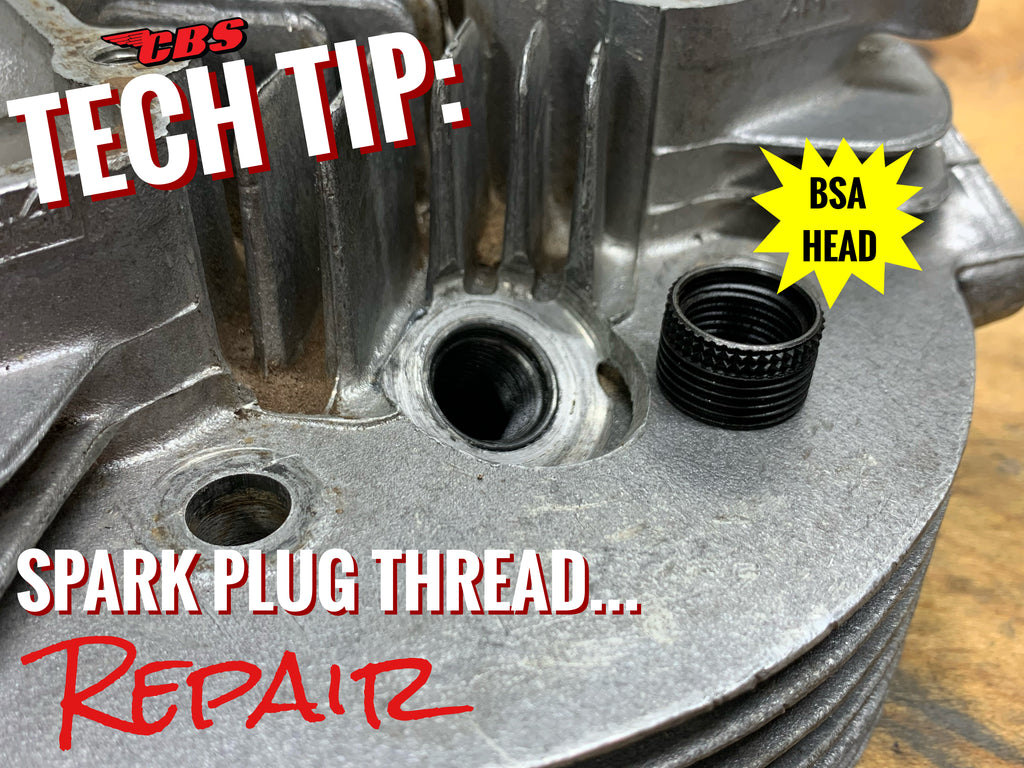
Last weekend I had the great opportunity to fix a damaged spark plug thread hole on BSA a C15S (Scrambler) head
There was barely enough threads left behind for a spark plug to thread into the existing hole
Today I will go over how I fixed the damaged spark plug threads using a Heli-coil / Save-A-Thread spark plug thread insert repair kit
Considering there are other ways to repair a damaged spark plug thread hole, I decided to use inserts over welding because the spark plug hole was too close to the valve seats
With that being said, lets dive in..
How do spark plug threads strip?

Over the past few years I have found that are 3 common factors that could lead to damaged spark threads which all can be avoided if taken the proper precautions
- Overtightening
Arguably the most common way to strip spark plug threads is by overtightening the plug beyond what your workshop manual recommends for torque value
Have good judgement!
- Lack of thread lubrication
Installing and removing a spark while the threads are "dry" will overtime develop damage
It is important to add a small amount of thread lubrication like Anti-Seize to your spark plug threads to prevent galling
-
Wear over time
Our 50+ year old motorcycles have had a lot of time on the road which means spark plugs get changed and checked
When this happens, thread engagement gets worse over time
How the kit works

As stated previously I will be using the Heli-Coil / Save-A-Thread insert kits
Each kit is designed to be used while your cylinder head is either on or off the bike
However, I highly recommend taking your cylinder head off to perform this job..
The kit (which can be found at your local Auto-Zone or O'reillys) comes with 3 steel inserts, special tap and a swaging tool
You may notice the tap included in the kit has 2 different diameters of threads with a large chamfer while retaining the same thread pitch - this allows the tap to thread into your existing 14MM spark plug thread hole while also cutting the larger hole larger followed by cutting new threads
Once the hole is tapped to the new oversized diameter, simply install your steel insert
I will use the supplied tap to screw in the new insert while adding a bit of JB Weld to the threads or green loctite
Lastly use the swaging tool to flare out the insert end
Expanding the top portion of the insert is critical to prevent the insert from dropping in the combustion chamber and preventing it from backing out
The repair process (5 steps)
Step #1

Be mindful of the finished hole sized before using the pilot tool included in the kit - make sure that your inlet and/or exhaust valve seat is not too close for comfort to your spark plug hole
If you have a head with damaged threads, you will need to purchase a spark plug thread repair kit from your local automotive shop or online parts outlet
Before starting the work I took some dimensions of the spark plug thread inserts I will be using So I can get an idea of which length of insert to use in the head
You might notice on some heads (especially smaller "CC" British bikes) you will find that that once you tap the spark plug hole to a larger size, your new hole could be very close and/or run into the valve seat
On this cylinder head, my spark plug hole was too close to my inlet seat, so instead of using the tool to remove material all the way through and expanding the hole diameter, I decided to go with the long insert and leave about .100” of material in the head towards the bottom to prevent the insert from entering the the combustion chamber and running into the valve seat (see photo above)
Step #2

I made a custom fixture out of 6061 to lock the cylinder head down to my angle plate on my mill
(Now to be clear, you can do this repair without a mill…)
Once I bolted down the head my main goal is to find the angle of the spark plug thread hole and to also find the center
When both where achieved I was ready to bore out the old threads
Step #3

I used a 5/8” end mill (not shown) to bore out the old threads
I set my depth to only go so far, leaving a .100” thick shoulder as we discussed earlier
Once done, I used the supplied tap in the kit to tap the new threads into the cylinder head
Step #4

Now that the threads are tapped into the head, it’s time to thread in the new insert
I will use just a small amount of JB Weld around the new inserts thread to help with securing the insert in place
JB Weld indicates that there metal epoxy mix will break down once the epoxy reached a temperature of 550+ degrees
If this is accurate, then JB Weld would withstand the heat that this head will endure under all conditions
Using a new spark plug I will thread the insert into the newly tapped hole until it bottoms out, followed by removing the spark plug
Step #5

The last step, but the most critical
Using the provided swaging tool I insert the tool within the top portion of the insert
Using a brass mallet, I strike the top portion of the tool to allow the insert to "flare" outward permanently locking the insert in place
If all is done correctly, you should have a good, strong and reliable insert that will not come out
This style of insert is designed to be a permanent fix
Food for thought
Now that we have covered and repaired this cylinder head, I wanted to cover 1 question that I always get
Here it goes...
- Why not use a conventional stainless steel Heli-Coil?
Through experience I have found that your traditional wire-style Heli-Coils can "unwind" themselves when used in aluminum cylinder heads
It appears that with heat and expansion if one were to remove a spark plug from a hot cylinder head, you might find that the Heli-Coil will back-out with your plug..
Thanks for reading todays post
Click here for more blog posts like this one
Should you have any questions, please drop us a comment using the comment section below
Ride safe!
Brian TINK Tinkler
Must be a BSA C15 thing… I had to do this same repair a while back. Nice tutorial.