Tech Tip: How To Make A Custom Fuel Line Assembly
A little over 4 years ago (2015) some of you might remember a post that we published in reference to a new product that would allow you to crimp fuel line ferrules.
If you can remember that far back, the original post has now been updated to this current post that you are about to read.
Today, I will show you how to make your own original style fuel line assembly using our very own parts that will give you a "stock" fuel line assembly exactly how vintage Triumph (and some BSA) motorcycles came equipped with back in the day.
Lets get to it
There is nothing more fulfilling than being able to perform your own work on your own motorcycle.
For myself, I would rather make the part I need (under some circumstances) rather than waiting on a part.
You can indeed purchase your own fuel line assembly complete ready to install, but wouldn't you want to learn how make your own?
- Cost effective
- Good skill to have
- Can adapt to most applications
- Quick to make
- Original look
- Great for restorations / originals bikes
Just like learning how to make throttle, choke and clutch cables its a great skill to have!
Before we begin making a fuel line assembly, lets go over some brief history on Triumph fuel line assembly's..
Original Triumph fuel line assembly's
Original Triumph fuel line assembly's that where fitted on most Triumph twins and triples (not all) typically came equipped with the following:
- Clear 5/16 I.D. x 9/16" O.D. hose
- Round 9/16" O.D. crimp-on ferrules
- Banjo's & fittings to accept 5/16" I.D. hose
There are others models including BSA and Norton's that came with different color line and sizes, but for the most part the parts described above where fitted as standard..
Many BSA and Norton models came equipped with various types of fittings and hose diameters that we will not be covering. However, you can make your own fuel line assembly using the sizes above assuming everything (line, banjo, petcock, etc) are compatible with each other
The supplies you need
Since we will be making a new and complete fuel line assembly, we will be using the following supplies to replicate my original gas line that came on my 1968 Triumph TR6R.
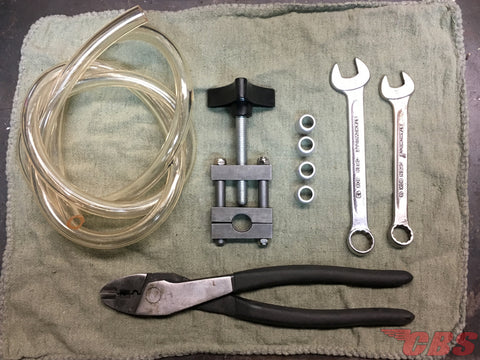
Here is what we have on the bench to get this fuel line project started
- Clear 5/16 I.D. x 9/16" O.D. hose
- Round 9/16" O.D. crimp-on ferrules
- Sharp cutters
- Fuel line crimping tool
- British / Whitworth wrenches
Parts list for purchase
In the boxes below you can purchase the same fuel line making parts / tools that we will be using in this post so you can follow along and make your own.
Most of the parts for purchase below can be used for "universal" applications.
Everything in the box below will work in conjunction with each other - tap the “click here” text to purchase your own fuel line parts
| Part name | Link |
| 5/16" X 9/16" Black Fuel Line | Click Here |
| 5/16" X 9/16" Clear Fuel Line | Click Here |
| 9/16" Fuel Line Ferrules (CAD Plated) | Click Here |
| 9/16" Fuel Line Ferrules (Brass Plated) | Click Here |
| Fuel Line Crimping Tool | Click Here |
| British / Whitworth Tool Set | Click Here |
Step #1
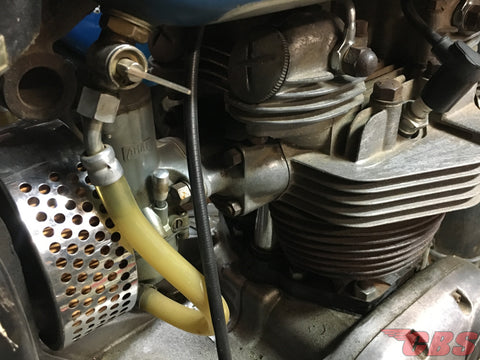
Here is my 1968 Triumph TR6R that requires a new fuel line assembly
As you can see, the original fuel line is very brittle (and hard) which should be replaced.
I will be using the original fuel line off the bike as a template to make a new one for this Tech Tip post.
Lets go ahead and remove the fuel line off of the motorcycle so we can begin to make a copy.
Step #2
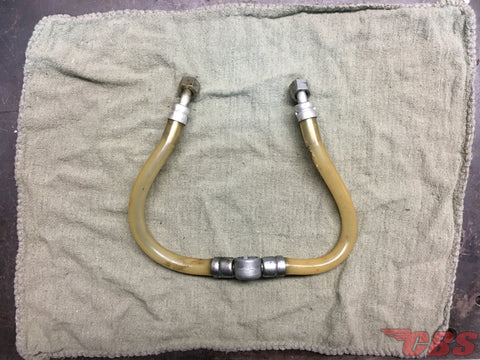
Now that the fuel line is disconnected we can start cutting and making our own line.
I recommend removing all existing fittings attached to the line and put them aside; we will be reusing everything as shown except the ferrules and the fuel line.
Removing the fittings off the existing fuel line may be difficult. Simply heat the line to allow it to soften then proceed to removing the fittings. Make sure the line is free of any gas or fuel residue!
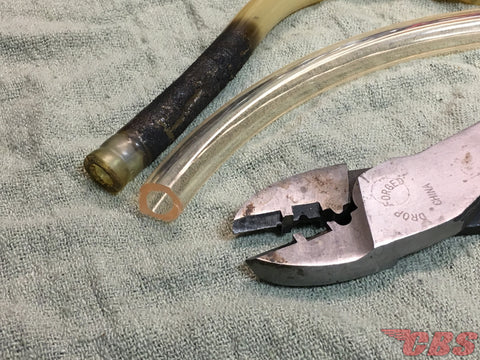
Use the original bare fuel line and measure the total length, take the total length and cut your new fuel line to the exact size.
Step #3
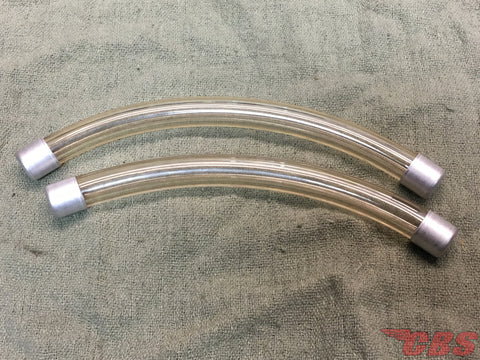
When you have finished cutting your fuel line and you are happy with the final length you can then slip a ferrule on each end of the line
Step #4
Prior to crimping make sure your fuel line is pushed "all the way home" or bottomed out on the fittings you are using. If you line is not bottomed out, it could throw-off your measurements and your line may be too long / short.
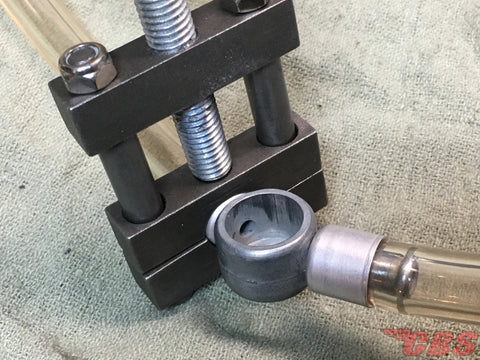
Grab your 1/2" ferrule crimping tool and place the tool over the ferrule you would like to crimp.
From there, begin to screw the plastic knob clockwise until the ferrule is crimped.
Once done, unscrew the knob and finish crimping all other ferrules the exact same way.
Always tug on the hose to ensure that a tight connection has been performed by the crimping tool.
The fuel line crimping tool as shown above will only work with 1/2" - 9/16" (O.D.) ferrules. Using the incorrect size will not allow the ferrule to properly crimp
Step #5
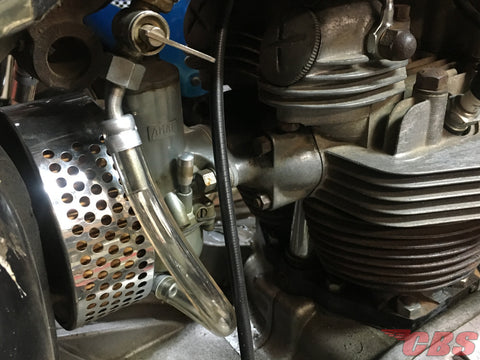
Now that your fuel line assembly is complete, it’s time to install it back onto your motorcycle.
Once installed make sure there are no kinks or tight bends that may spell trouble down the road.
If you are happy with your results, tighten everything up and consider the job done.
Recap
There you have it..
In just 5 easy steps you can have a factory style fuel line assembly that will last up to a year.
With ethanol in our fuel, the clear fuel line will turn hard and yellow over time, there is no way around it.
If your fuel line turns yellow and needs to be replaced, you do not need to purchase a complete fuel line assembly but simply purchase fuel line hose, and ferrules..
Thanks for reading
Thanks for reading today's Tech Tip post
If you have any questions please let feel free to leave us a comment in the section below.
Click here to read more Tech Tip posts like this one!
Ride safe! - CBS
10 comments
Lot of crimps when doing a twin carb set up! works well but I avoided over tightening the crimps for a more uniform look. Look good , no leaks. Sadly all fuel lines yellow and harden with age. Not an issue.
Good write up thanks for the step by step procedures.
@Dale – They are ethanol proof but the clear hose will yellow out close to a year. I have not found a clear hose that does not yellow. Honest answer!
@Mike – They are crimped on..
How are the fuel line/ferrule setups held on to the banjo bolt and the petcocks?